Through Every Season

Tag: Creative Stuff (Page 1 of 4)

Even the Prickly Ones

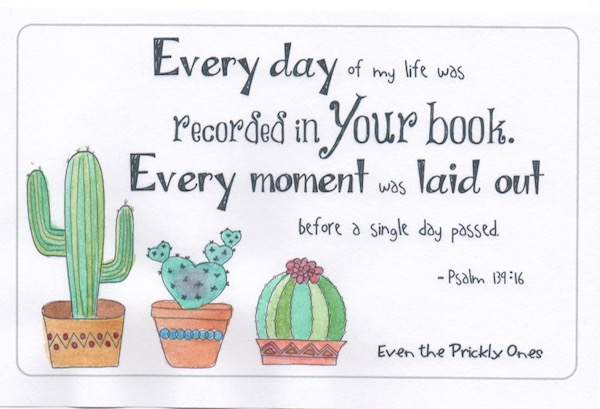
One way I meditate on the Word is by illustrating verses with watercolor. I included succulents with this verse because it feels prickly to me. The idea that God is sovereign and had my life planned out before I existed both comforts and frustrates me. I don’t always like His plans, but if I could control everything, what would the repercussions be? How many things would I mess up?

I am comforted when I remember that God is good and loves me so much that He gave His own Son for me. He has all my moments planned out, even the prickliest ones. He will walk me through them step by step. I can rest in His competence, trust and obey.

My vision is poor. His is perfect. I can’t understand all He does or allows, but I can trust that He is a Master Redeemer. He does all things well. In Heaven, my faith will become sight and I will be awed by His glory.

Much love,

Jenny

My Good Samaritan

One of my most prayed prayers since losing Joel has been that Jesus would come be my Good Samaritan; that He would bind up my gaping wounds and pour in the healing oil of His Holy Spirit into my crushed heart.

Sometimes I feel Him take my hand and the warm oil of His Holy Spirit rushing in, others I feel like I am drowning, alone in a sea of tears.

The LORD is close to the brokenhearted;
He rescues those whose spirits are crushed.  Psalm 34:18

In the beginning… God introduced Himself as Creator. It’s such an important concept; one the enemy of our souls has fought so hard to take from us.

He created us
In His own image.
He KNOWS us.
He LOVES us.
We have purpose.
The Eternal One has
Breathed us to life.
We were created for Eternity.

No one KNOWS us like our Creator does.
To love someone you have to know them.

Jesus
came
incarnate
to know
to make Abba known
to experience our suffering
to transform it into redemption.

One of the things that has brought healing into my life has been creating; making quilts, needle arts, drawing, painting signs, scrapbooking, and digital art. There is something about taking time to see and to touch created things while listening to my Creator and allowing Him to create something new through me that is healing.

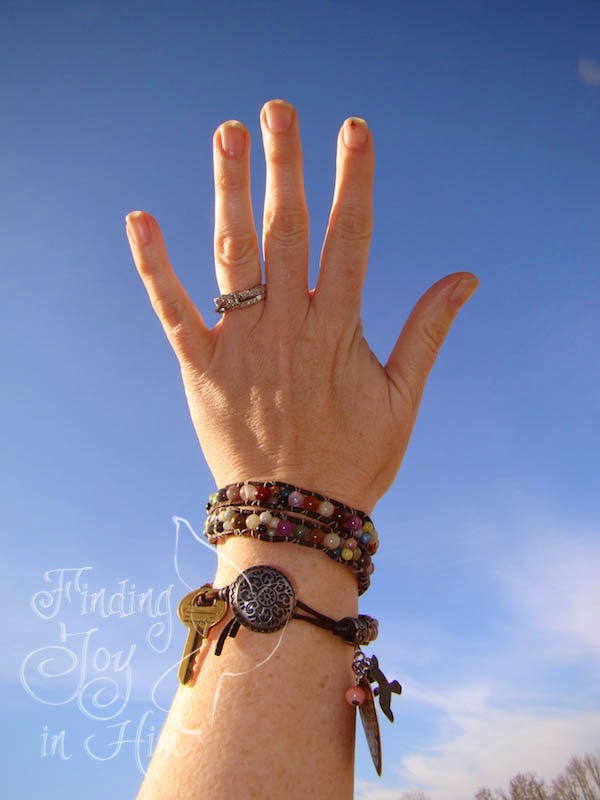
One of the first things that I created after losing Joel was a bracelet. I made it using beads from a broken necklace and two bracelets I seldom wore. Something new created out of brokenness. I call it and another bracelet that I made and now wear often my chains of hope.

This hope we have as an anchor of the soul, a hope both sure and steadfast and one which enters within the veil, where Jesus has entered as a forerunner for us, having become a high priest forever according to the order of Melchizedek.  Hebrews 6:19-20

My recreated bracelet wraps around my wrist like a tourniquet representing the tourniquet my Good Samaritan is wrapping around my wounded heart.

The stone and glass beads create a band of color that reminds me that there is still color in the world after all the color leaked out of my broken heart and all that was left was gray and muddled. I only recently noticed how muddled even it’s colors are.

For now we see only a reflection as in a mirror; then we shall see face to face. Now I know in part; then I shall know fully, even as I am fully known. 1 Corinthians 13:12

There is key on one side representing the key to my heart given to my Lord and a guitar pick on the other (for my heavenly guitar player) decoupaged with portions of

Psalm 84
How lovely is Your dwelling place,
O Lord Almighty!
My soul yearns, even faints.
for the courts of the LORD;
My heart and my flesh cry out
and sing for joy to the living God…

and

Revelation 21:3-5
And I heard a loud voice from the throne saying,
“Look! God’s dwelling place is now among the people, and He will dwell with them.
They will be his people, and God Himself will be with them and be their God.
‘He will wipe every tear from their eyes.
There will be no more death’ or mourning or crying or pain,
for the old order of things has passed away.”

He who was seated on the throne said,
“I am making everything new!”
Then he said, “Write this down,
for these words are trustworthy and true.”

Together they create a set of wings for my soul.

Oh, that I had the wings of a dove! I would fly away and be at rest. Psalm 55:6

Late last summer, I felt the Lord drawing me to start painting as a creative way to heal. A short time later, I learned about a new Facebook group started by Shanna Noel of shannanoel.blogspot.com that is creating worshipful art journaling in the margins of their Bibles.

It has become my happy place. 7000 members who love the Lord and His Word and purposely set aside time to prayerfully meditate His word and express their hearts to Him in art. 7000 members and growing. Many tell prodigal stories of reading the Word for the first time.. and others share what they are now teaching their children; happy joy.

I bought myself some watercolors and pens with my birthday money. And yesterday I created my first painting. I amazed myself, and that doesn’t happen often. James was impressed and encouraged me to include my bracelet in my painting because it is “me.” Judi said I needed lessons. Ouch. With that repeated, I won’t be pointing out my mistakes.  🙂

“Deeper” by Delirious? had been on my heart for several days. When I first heard it over 10 years ago, it inspired me to take the kids down to our neighborhood pool, face my fear, and jump off the diving board into the deep end of the pool.  Not exactly the smartest thing.. because I really “don’t know how to swim” but how I long to dive deeper into God.

It’s a painting of what I am choosing to believe.  Mostly what I feel is the drowning and the trying without success.. not a lot of the holding, and lifting, and saving.

Although, I had imagined Him rescuing me many times, actually painting God’s arm was a truly spiritual experience.

I felt His presence;
His flesh pushing through the heavens for me.

Painting was an act of lifting up my colorful chains of hope.. of pointing the wings of my soul towards my Help and He responded by giving me a little deeper revelation of Himself.

Psalm 63
1 O God, you are my God;
earnestly will I seek You;
My soul thirsts for You;
my whole body longs for You
in this parched and weary land
where there is no water.
2 I have seen You in the sanctuary,
beheld your power and glory.
3 Your steadfast love is better than life,
so, my lips will praise you.
4 I will bless You while I live;
I will lift up my hands in Your name.
5 You satisfy more than the richest feast.
I will praise you with songs of joy.

6 I lie awake thinking of You,
meditating on you through the night.
7 Because you are my helper,
I sing for joy in the shadow of your wings.
8 My whole being follows hard after You
and clings closely to You;
Your right hand holds me securely.

Thankful for my Creator Abba, Who so loved me that He sent Jesus to became flesh and rescue me.

Love,

Jenny

2 Bicycle Wheels = 1 Pot Rack and 1 Mobile

I love bicycles as art.  
Mike and I’s first piece of art was a poster of bicycle. 
It’s hung in many homes; 
living rooms, a bathroom and now in our kitchen.
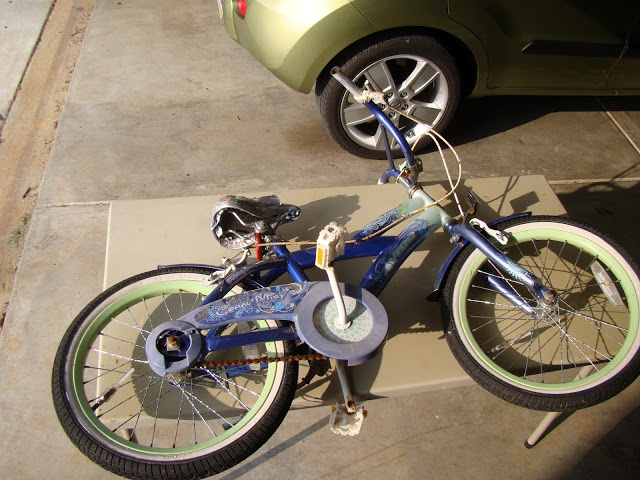
I found this bike at a thrift store last Friday.
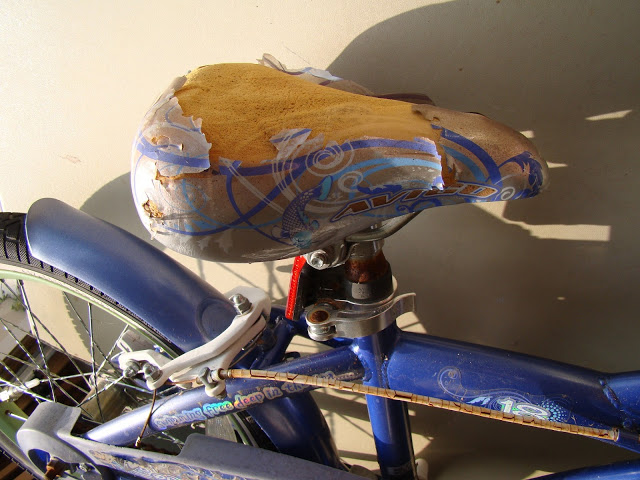
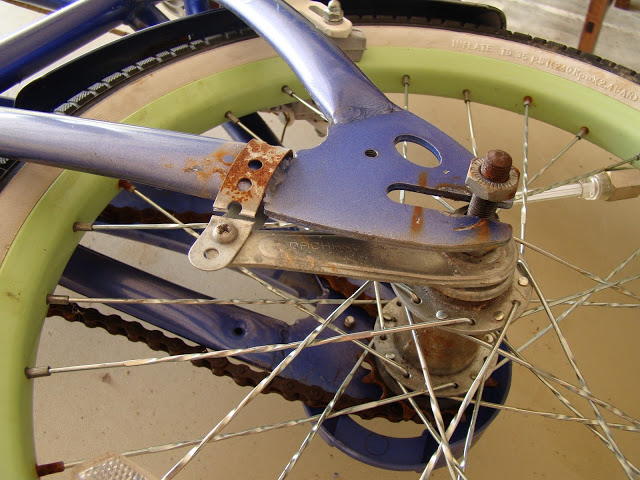
 It was small, old, rusty, and the seat was torn to shreds
and the color of the wheels remind me of my car!
 It was exactly what I was looking for 
and for the exact price I was hoping for – 5 dollars!
I “hid” it in my garage with our other bikes 
over the weekend hopping Mike wouldn’t notice and 
I wouldn’t have to explain why I bought it.
 Saturday morning he asked,
“Why is there a little girl’s bike in our garage?”
I didn’t want to say, 
“I am going to use it for a pot rack and a mobile that I saw on line;
see how cool they are?”
So I said, “I bought it for parts.” 
He was a trooper and didn’t ask any more questions.
Thank you, Sweety.
Monday morning, I got to work.. 
I looked up on youtube “How to take off a bike wheel.”
I LOVE youtube.  I learned that you have to disconnect the brakes
first then turn the nuts “counter clockwise.”  Knowledge is power.
The only problem I had was with the little safety screw thingy above.
The screw wouldn’t budge.  I had to cut it off with a hack saw.
Once I had both wheels off, I took one to the store for parts
which came in a little under 6 dollars.
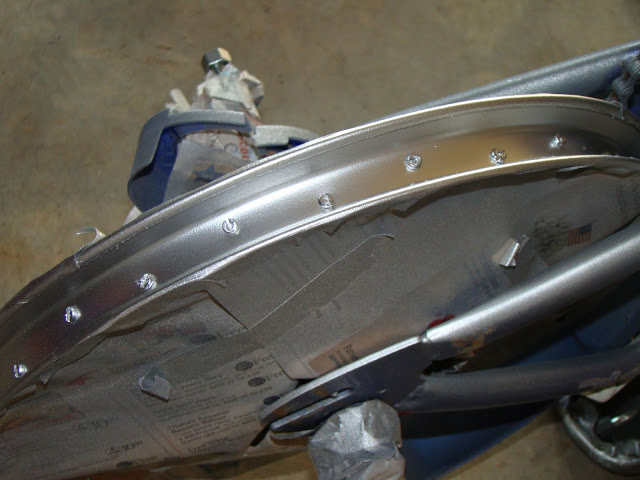
 Then I cleaned up the wheels a little with soap, water and sand paper;
they were pretty rusty. Then I taped up and painted the inside rims
with rustoleum primer (to stop the rusting) then metallic paint,
which I had on hand from other projects.  🙂
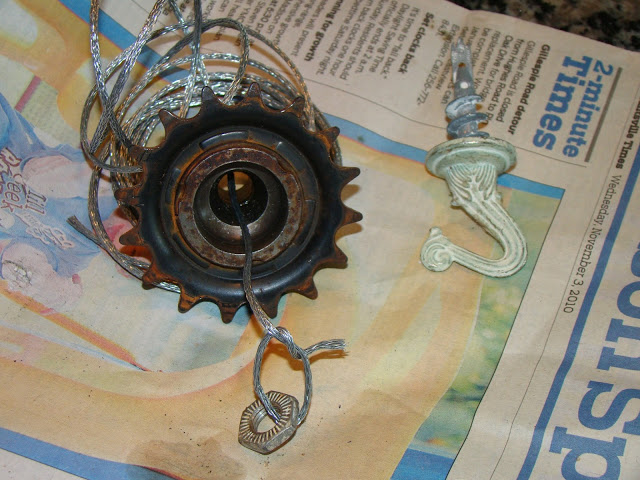
I saved the smallest gear to hang up my back wheel;
I thought it was cute and I needed something to fill up the big hole.
I had the ceiling hook on hand, too.  It matches, too. 🙂
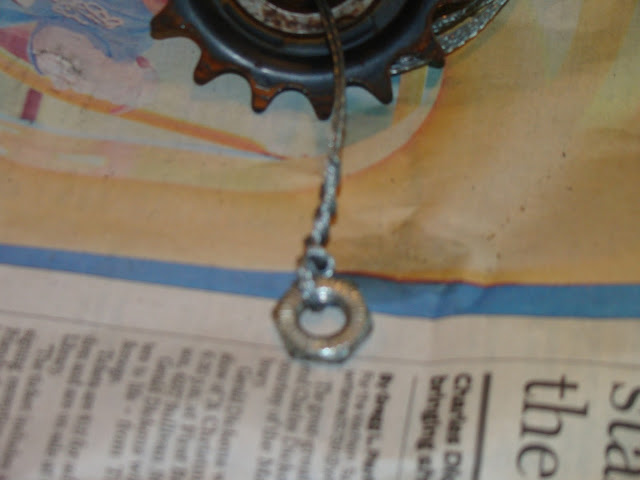
This nut from the bike was big enough not to slip through the gear hole.
I took some picture wire (from other projects) and tied on 
with an overhand knot to secure it,
 then wrapped the end of the wire around and 
pulled it through the gear and back wheel.

I made similar loop/knot on the other end to hang on the hook.
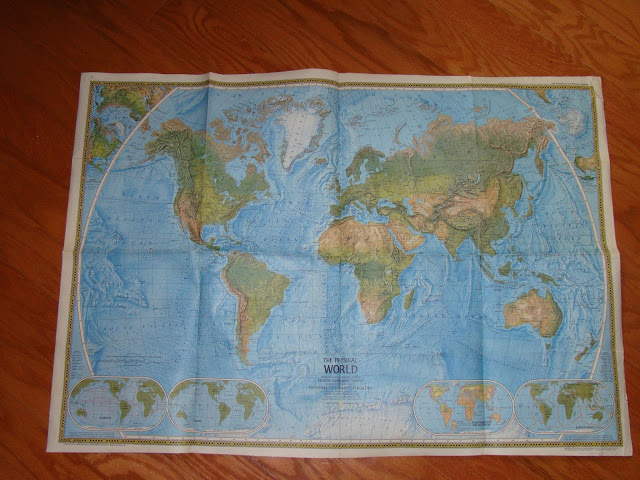
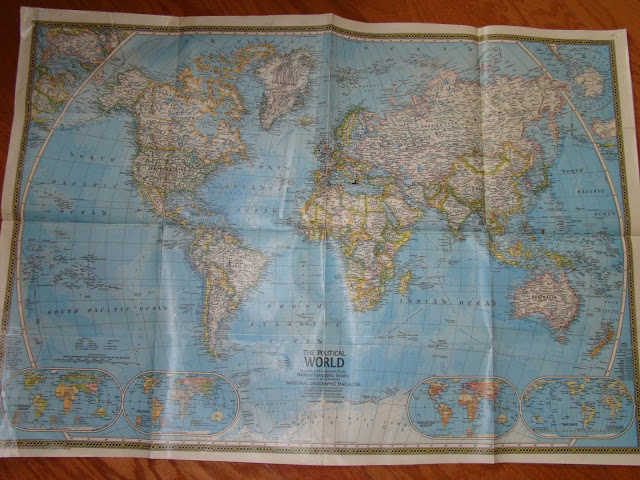
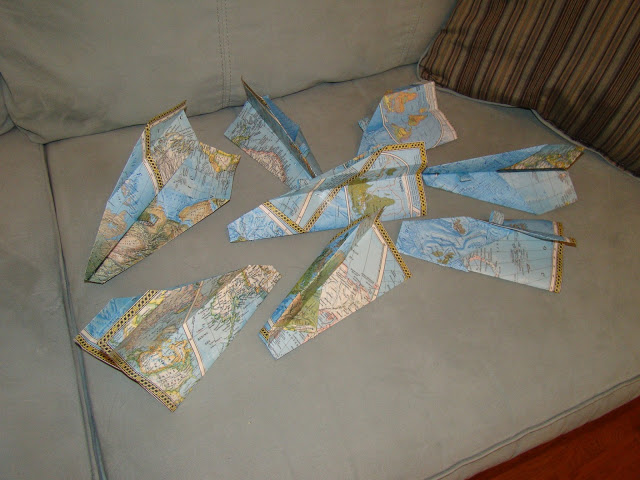
I dug through my school supplies and found this world map.
Pretty isn’t it.  It’s from 1975.
So old that I felt guilty using it for school 
way back when the kids were little. 
I googled “How to make paper airplanes” and found diagrams on this site.
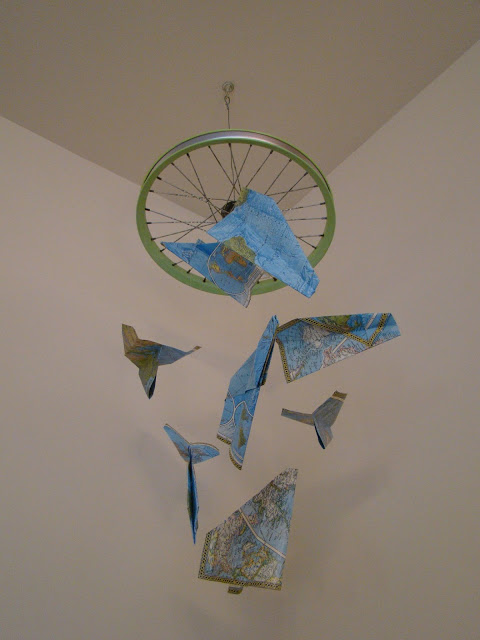
I cut up my map and made it into 8 paper air planes.
I tried to make each one a little different.
I “laminated” my map with clear contact paper 
way back when.. so they were nice and thick.
I stapled in a small strip of map to make a loop to hang them from,
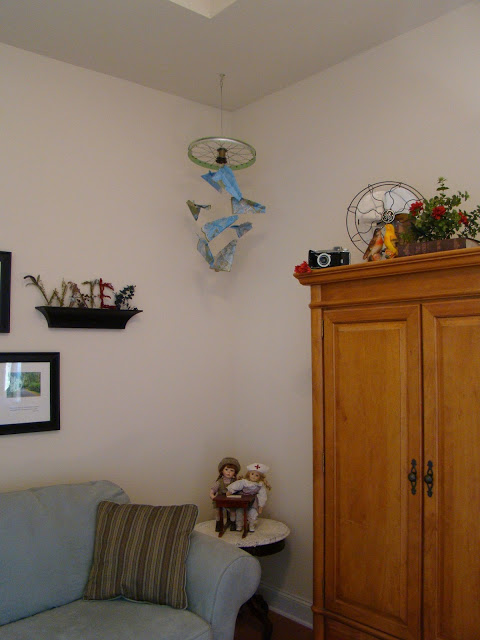
 then hung them from my back wheel.
 Isn’t it great?  That space looked so naked before.
 On to the Pot Rack:

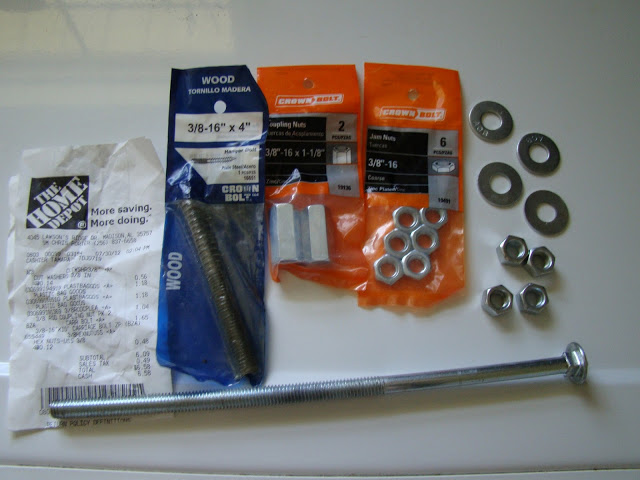
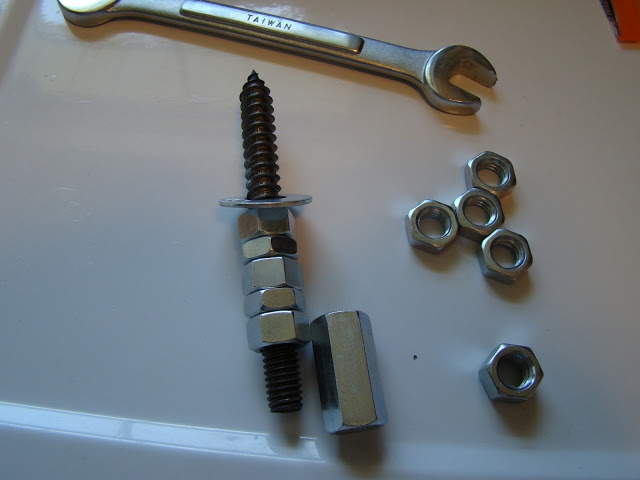
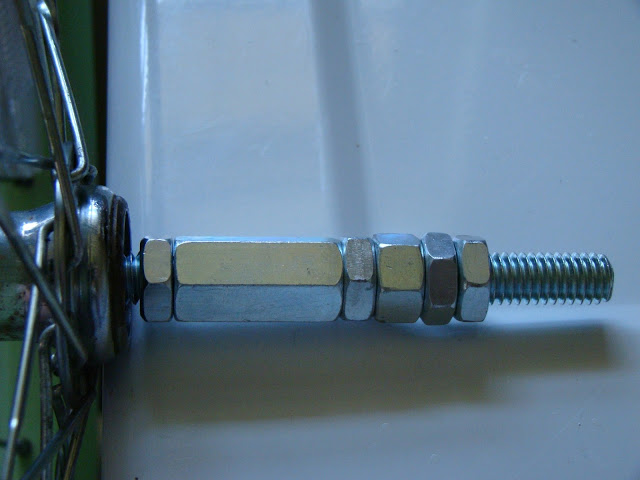
 These are the parts I bought earlier.. 
(all 3/8″ – same as the bolt from my bike)
a wood to metal screw, couplings, hex nuts, jam nuts,
 washers (I only used one), 
and a 10 inch carriage bolt that ended up being too long,
so I switched it out for a 6 inch one later.
 I really appreciated the instructions from the link above.. 
but felt like I needed more pictures, so I took some.
I filled up the medal side of the wood to medal with nuts
and topped it off with a washer,
 leaving just enough threads for the coupling to screw halfway up.
The jam nuts are what keeps everything from unscrewing.
When you tighten them against the other nuts, they lock in place.
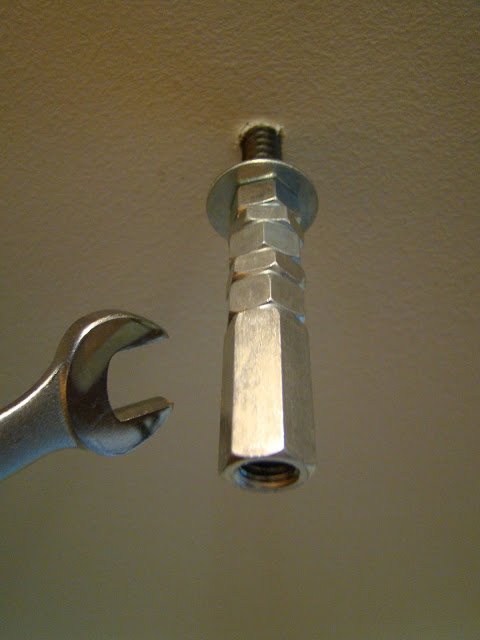
 I found a joist in my ceiling with my stud finder,
 drilled a small hole through, then I used my wrench 
to screw the wood to medal screw into my joist.
I always wondered how you were supposed to screw those
things in without missing up the threads.
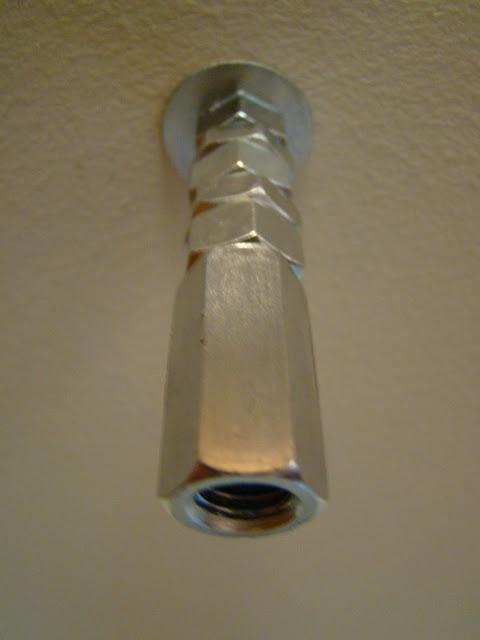
 I tightened all the bolts together 
and I had a secure place to hang my pot rack.
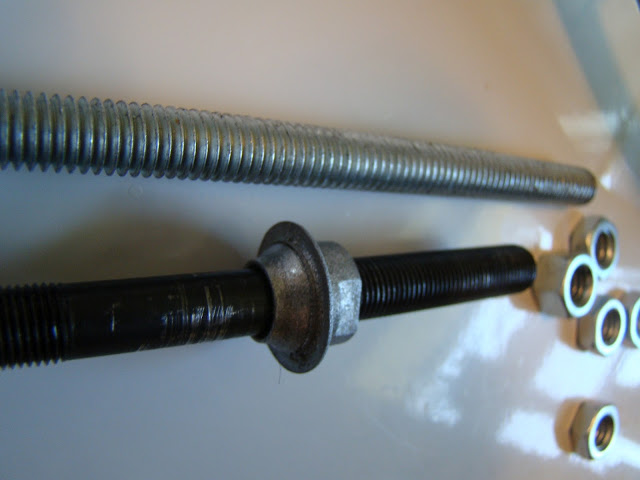
 The threads on my bike wheel bolt were tighter than the threads
on my carriage bold so I was unable to keep my ball bearings and cone. 🙁
I exchanged my 10″ carriage bolt for a 6″ one.
filled it up with nuts and the extra coupling.
The guy from the web site above used a bunch of washers.
The nuts were more economical and lock nicly.
I left enough room to screw into the coupling
and a little room near the wheel so I could 
get to the tightening ridge under the head of the bolt, and
so I it would be a little loose for turning and reaching my pots.
I screwed it into my coupling and tightened all the nuts.
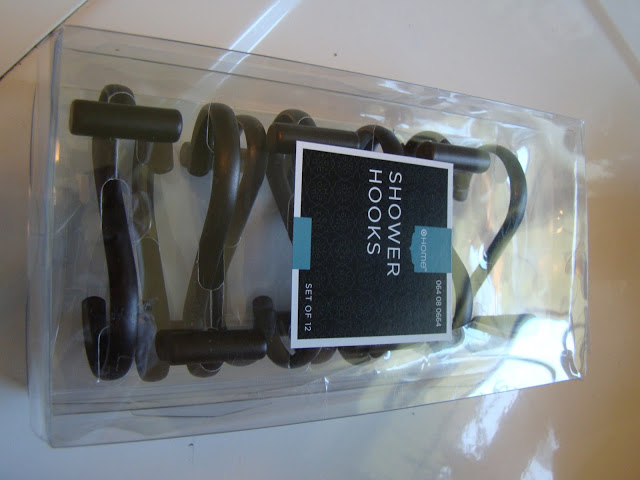
Next I got out these $9.00 shower curtain hooks I found at Target.
They were much cheeper than any pot rack, or “s” hooks I could find.
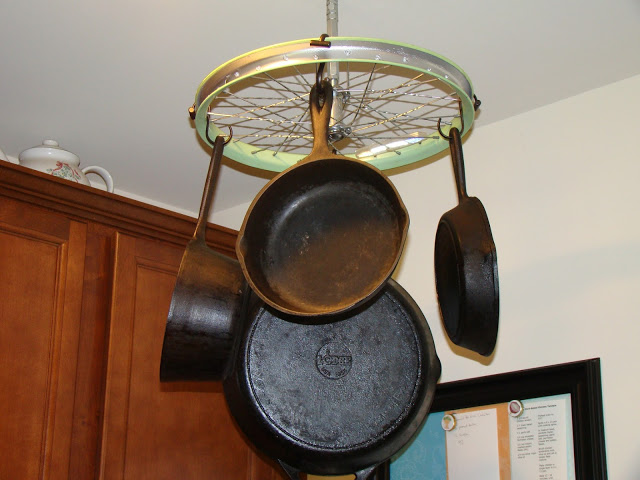
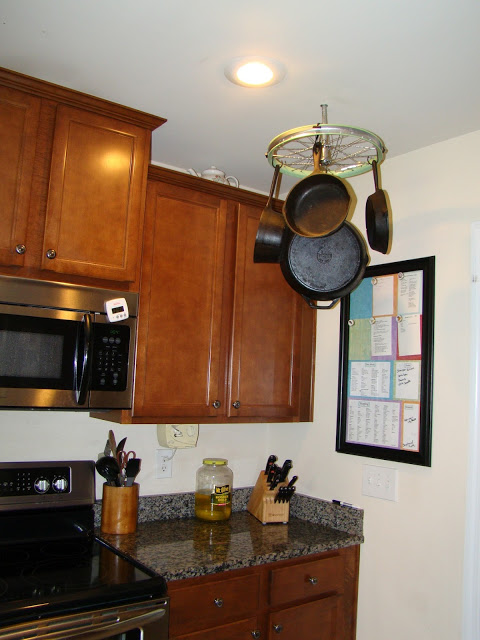
  And ta-da.. they match my cast iron pots and pans..
I like it..
Much easier access than in my crowded cabinet,
much cheaper than any other solution I could find
(just under twenty bucks), fun and a little artsy,
and my pans can air dry without getting rusty.
Hope Mike lets me leave them up.
Love,
Jenny
Making Meal Planning and Preparing Easy

Cooking has never come naturally to me.
So I’ve been working on making 
cooking and shopping as easy as possible. 
I’ve been finding recipes on line and 
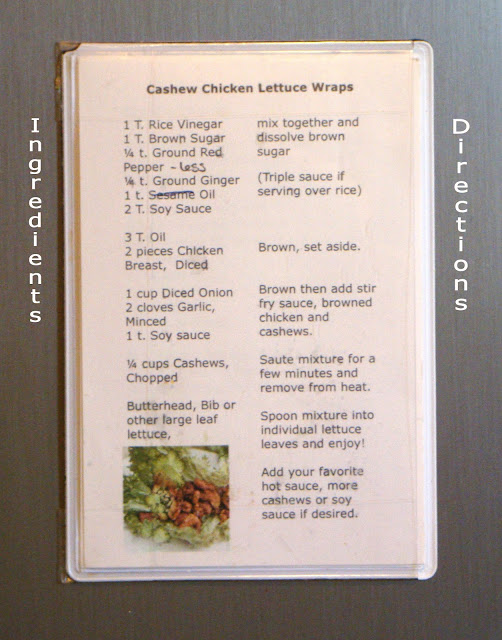
printing them on 4×6 cards for a while now.
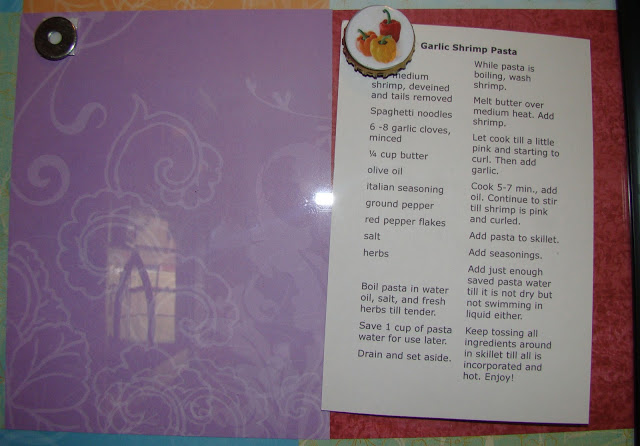
I like using this protective photo magnet sleeve to hang 
them on my oven vent while cooking… easy and accessible.
I list the ingredients on the left with what to do with each one on the right.
Once abbreviated, most recipes will fit on the front of a 4×6 card.
Longer recipes are usually too complicated for me.
I write notes right on the card while using it; making it easy 
to adjust the recipe to our taste and reprint it on a new card.
This one called for too much red pepper.
I found this mini planter at Michaels to hold my 4×6 recipe collection.
If at least three of my four kids like a recipe, 
I give it a star for each and it goes into my box.  
If fewer than three want me to ever make it again,
it goes into the trash.. unless I really like it.
A few months ago I made this menu planner out of a 
14.5″ x 24″ frame that I found on sale for $10 at Michaels..
I used scrapbook paper in my favorite colors to define each section.
There’s space for six 4×6 recipe cards in the top half. 
Keeping these visible helps keep me inspired.
I’d seen many ideas on how to hang recipe cards;
on a string with clothes pins, in pockets, on cork board…
I like magnets and decided to attach 
washers to the glass to attract the magnets.
Learn from my mistake and don’t use hot glue ..
Many burnt fingers later and.. it peels right off the glass.
Double stick tape does the trick.
I decided week day magnets would be a set-up for failure,
and made vegetable themed bottle cap magnets instead.
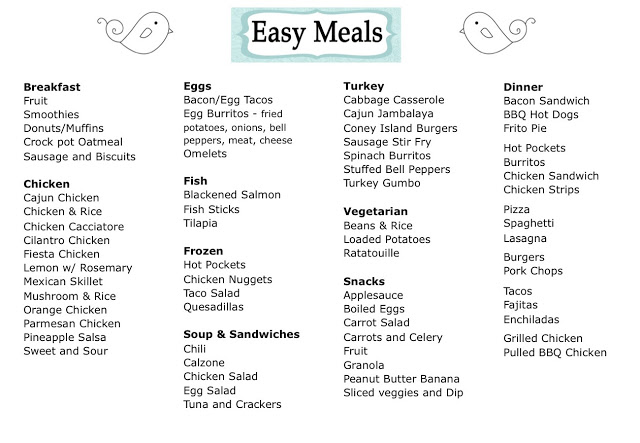
The bottom half of the frame holds a list of 
 easy meals that I made years ago to help me stay
out of the rut of making the same thing every week
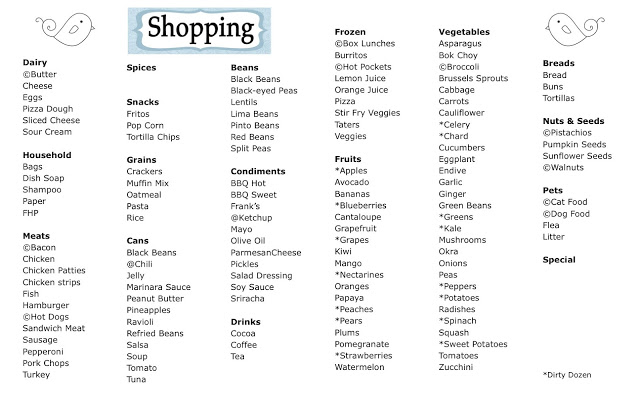
And this shopping list..
I had hoped framing these would inspire the kids to 
mark their wish lists on it..  so far they haven’t. 
Occasionally they’ll call out, “Mom we’re out of ____”
And I’ll tell them to add it to the “list”.
Dry erase marker wipes right off the glass.
On “Shopping Day”, I print out a new shopping list,
and one or two new recipes from my “Recipes to Try” computer file.
Then I mark my list as I go through my recipes, 
check my menu planner/list, fridge, and cupbords.
It’s working pretty well.  We’ve tried a bunch more new recipes
since making the menu board.  Even Judi has gotten on line
and helped me find new recipes to try.
Love,
Jenny

Christmas.. Wrapping Things Up

For many Christmases now, the kids have wanted only 
two things: money and candy.
There were many early years were we only had five dollars for each from us,
but their grandparents aways gave them plenty for a nice Christmas.
When they were younger, we actually gave them 
their money and took them to the toy store
before Christmas, so we could wrap their presents
and put them under the tree.
A couple of years we bought a family gift.. like a game system.
One year we went on a family vacation as our gift.
Two or three years ago we super surprised them
by shopping for them and sneaking their presents in
late one night while they were asleep.
They never even thought to look in our closet..
because we had never hidden gifts from them before. 🙂
We never have presents under the tree..
now that they shop on line after Christmas.
I think the last couple of Christmas mornings we just pulled stuff out 
of Walmart bags and gave them to them.  🙂
This year I decided to be a little more creative 
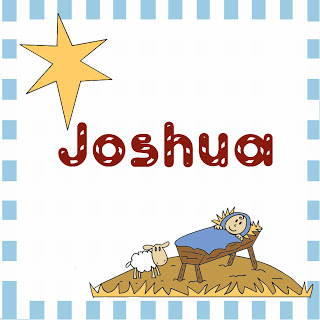
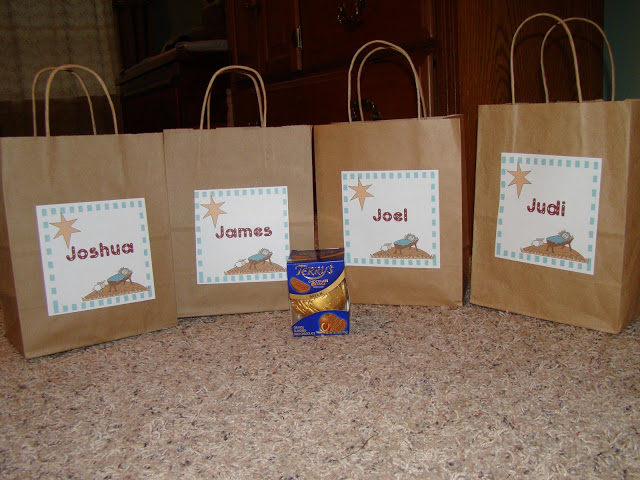
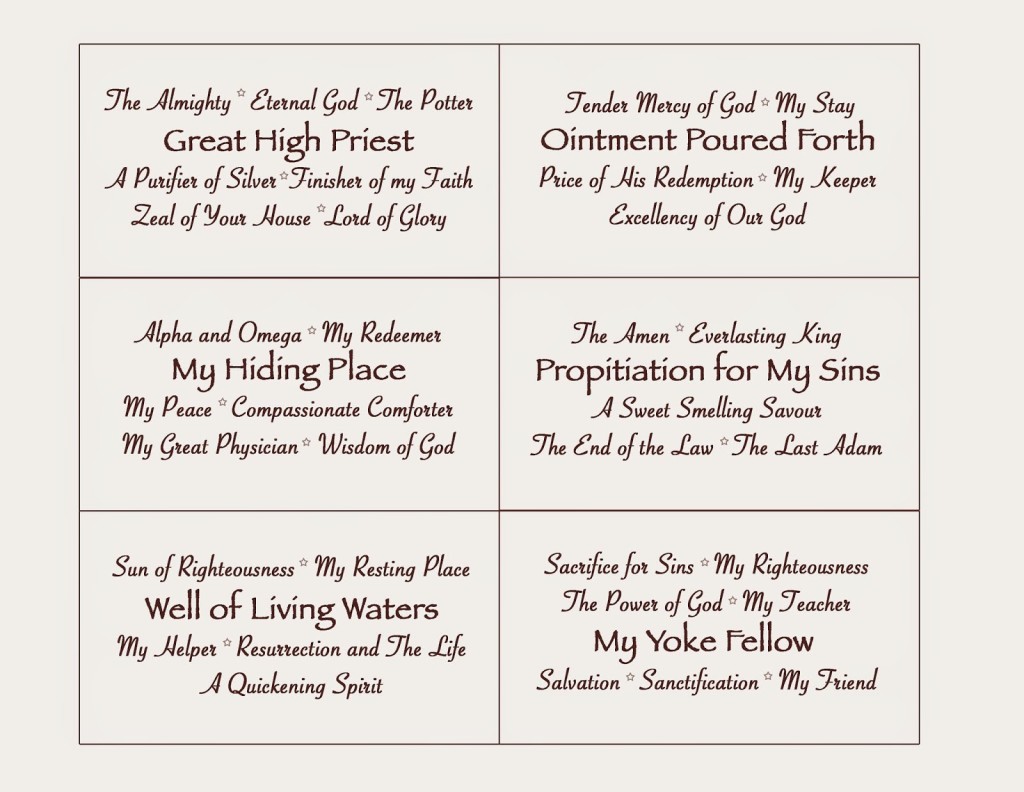
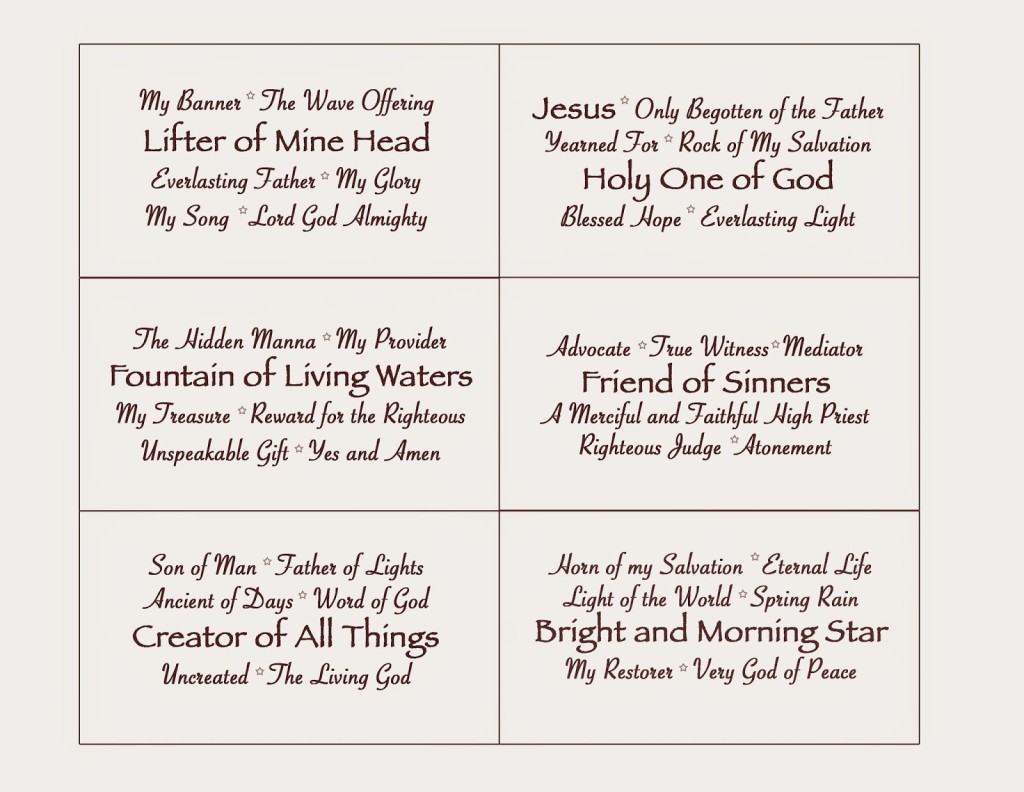
with their candy/money wrapping and made these gift bag tags..
using part of this free printable nativity I love.
We discovered chocolate oranges a couple of years ago. 
They instantly became part of the tradition.
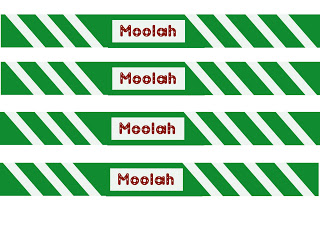
I made these money wraps for their cash yesterday.
Most years I forget to go to the bank in time, and have to
write them an IOU.  This year I actually got their 
grandparents’ checks cashed in 10’s and 20’s for them.
And bought them some things they needed like socks and gloves.

Judi’s been a little confused by my redecorating everything
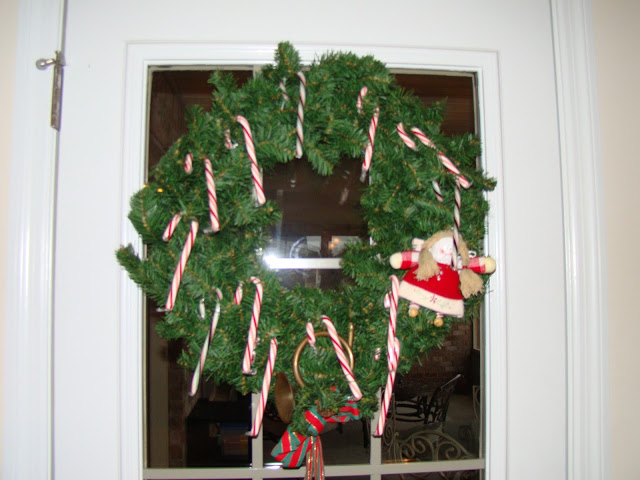
and insisted that we keep the candy cane buying tradition, too.
I didn’t want them on my tree, so I put them on this wreath instead.
I usually buy 2 dozen so the kids get 6 each.
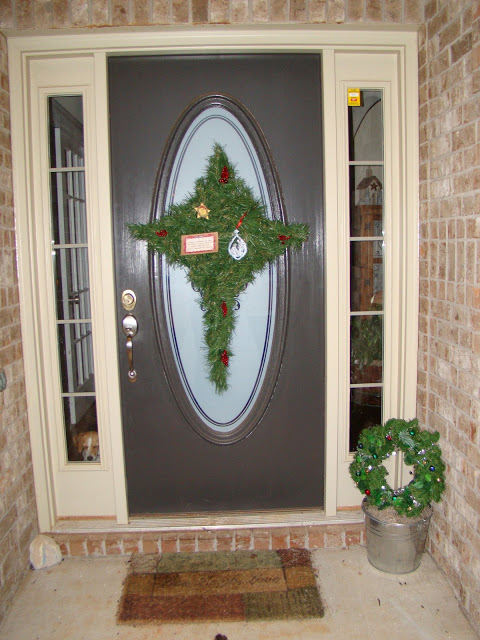
I made this star/cross wreath some time ago out of
the 4′ Christmas tree we had before inheriting my grandmother’s
much nicer tree and some dowels and wire.. it fell apart.

I redid it this year with duct tape and twine.
It’s much stronger now.

I put an extra wreath in the bucket I bought for my fall flowers.
The bucket needs a red bow.. doesn’t it?

Back inside…
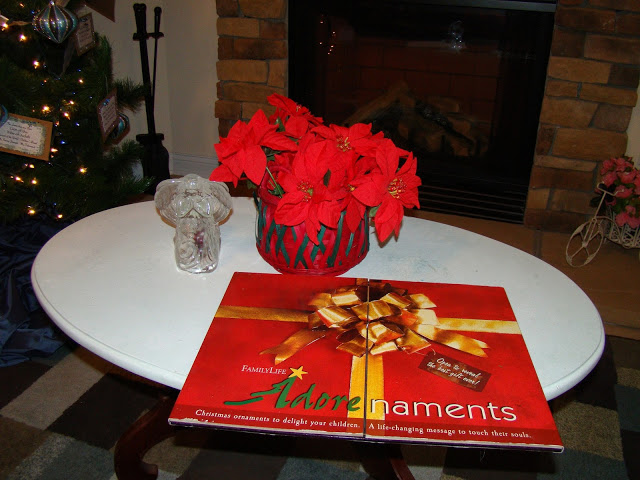
 Have you seen this book?  I really like it.

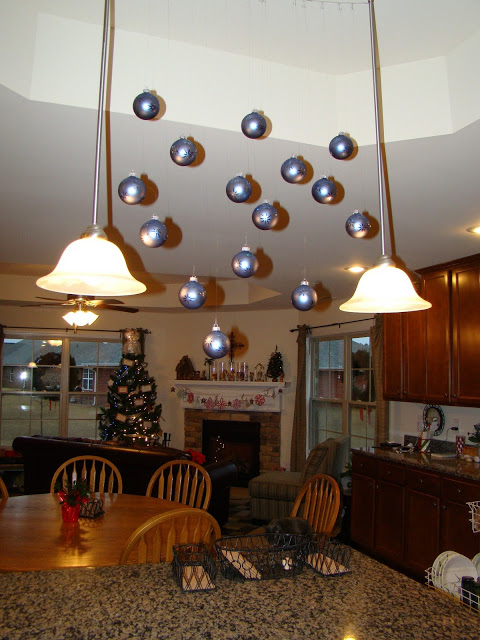
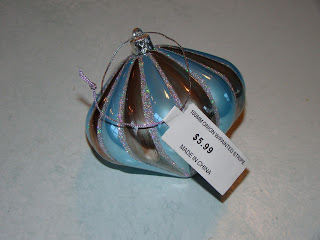
 I had packed these glass ornaments (below) in our advent candle pillars
for our last move and didn’t find them until this week.. (over two years later).
I haven’t been together enough to actually do an advent devotion.  
Maybe next year with the book above.
I decided they would be safer hanging here than on the tree.
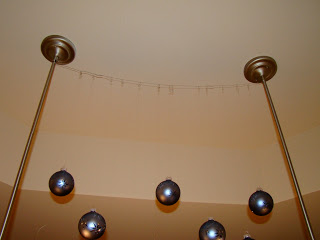
I hung them across some wire left over from my 

names of Jesus ornaments with some invisible thread.

I think they look like musical notes.  Even Judi thought they were cool.
They are the same color blue as the satin I used to wrap the tree.

Hope you have a wonderful Christmas.

Love,
Jenny

Nativities and Garlands

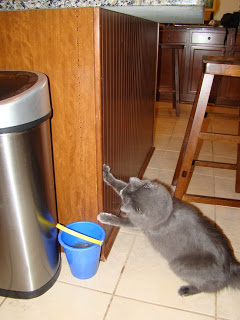
George loves to knock things down from my counters and such 
and bat them around for a while..
Zoe loves to eat the things she knocks down.
I am renaming them the George/Zoe demolition team.
They spent last Christmas knocking down and eating pieces of my nativity. 🙁
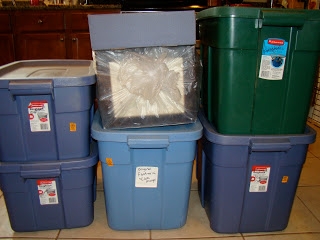
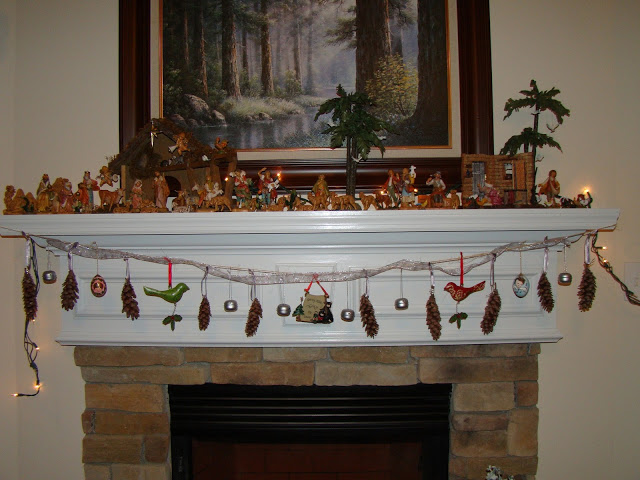
I have a lot of pieces.. they fill up all these boxes.
I wasn’t looking forward to losing pieces this year.. 
Mike suggested that I use both mantles (George doesn’t bother them)
instead of keeping the whole nativity in one room.  Brilliant!
I actually like this arrangement better than last year..
Using the different rooms allowed me to separate them into sets.
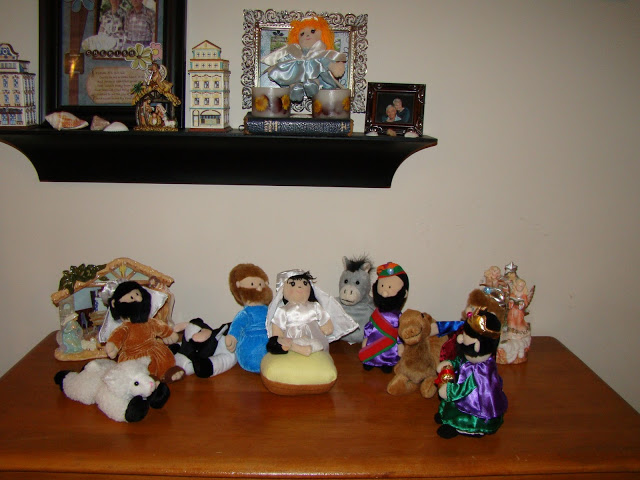
I put my soft nativity on my dresser.  It’s not as enticing as the smaller pieces.
  It needs a manger.. or mat or something.. project for next year?
 
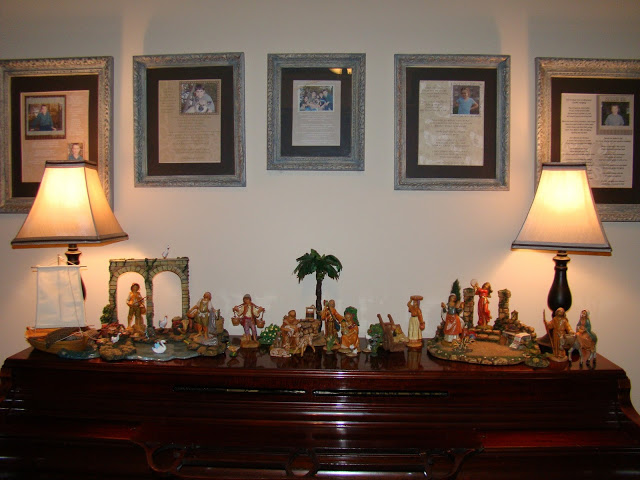
On the right side of the piano, 
I have Joseph and Mary traveling to Bethlehem.
Since George can actually get to this one,
I sprinkled it with cyan pepper (great cat repellant).
So far so good.

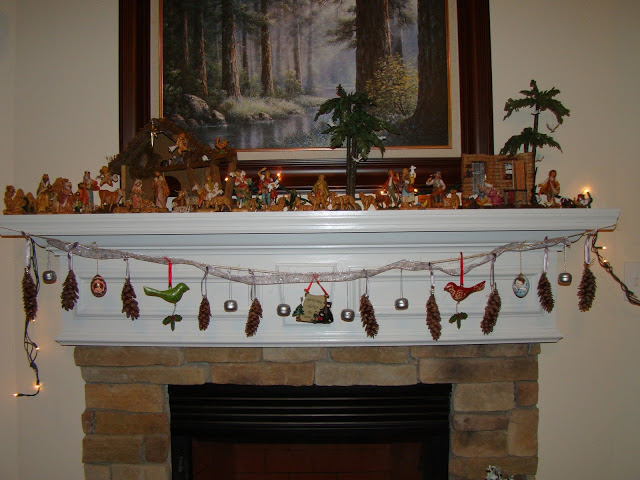
I put my main manger scene on the mantle in that room .
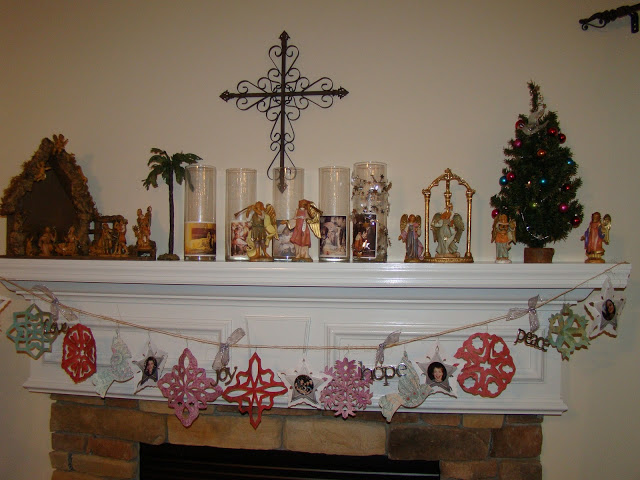
Then our original set and collection of angels 
and advent candles on the mantle by the tree.
The garlands are new… 
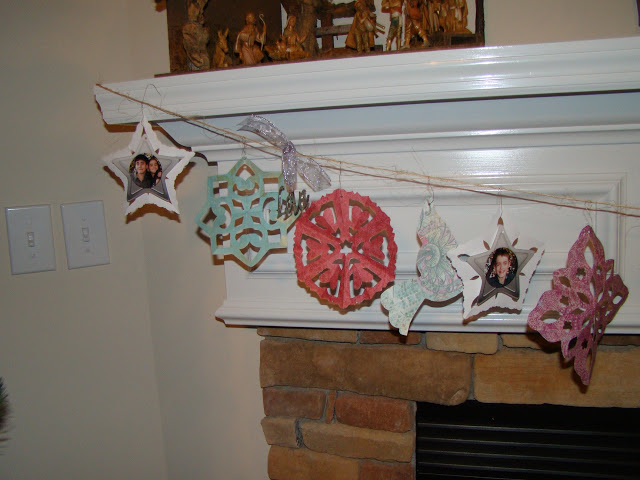
I’d seen several garlands in blog land and was inspired to make my own.
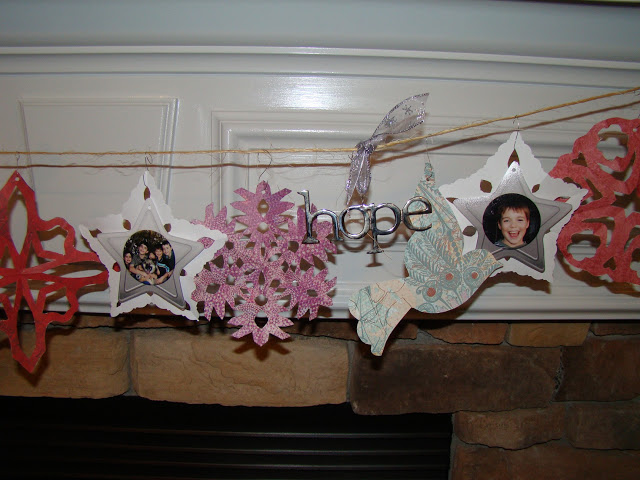
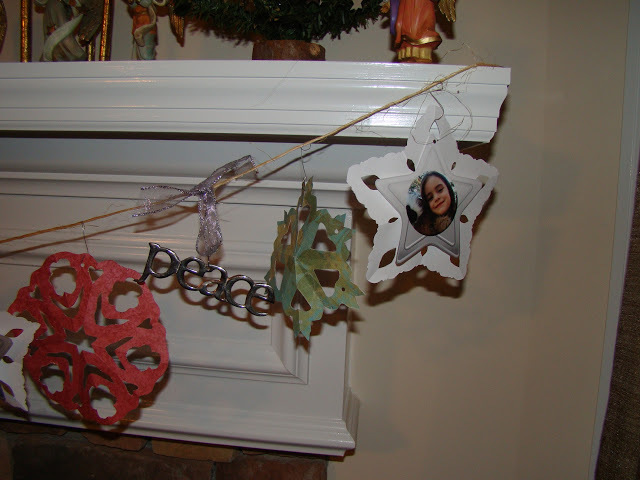
I made some paper snowflakes out of leftover paper 
from my names of Jesus ornaments.  I thought the colors would
stand out better than white snowflakes against a white mantle.
Then added my “Love, Joy, Hope and Peace” ornaments to them.
And cut out two doves.
Then I found a star png on google (love google) and photoshopped 
some old pictures of the kids on top, and had them printed at Walmart. 
The cut out stars were kinda lost in the garland by themselves,
so I googled how to fold a 5 pointed snowflake to help show them off.
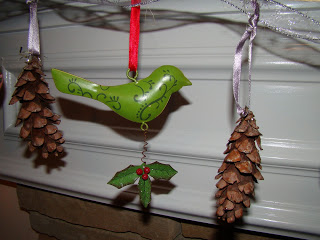
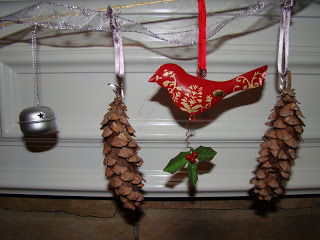
My other garland is made of some other random ornaments that 
I didn’t know what to do with.. I was really surprised 
when saw that I had a woodsy theme once I they were up.
I had these birds and bells which I liked,
but didn’t go with my new themed tree.
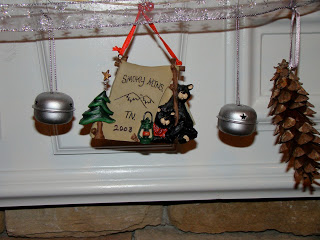
This Smoky Mountain souvenir was too
Christmasy to wait for my January wreath.
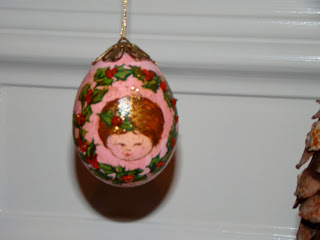
 and these two lonely eggs..which 
Mike’s grandmother made for us years ago
are so small that they didn’t show up in the big tree.
There were twelve painted eggs originally..
before all the years of kids decorating and knocking over trees… 
I added some pinecones which were my original inspiration
 And.. ta da a woodsy garland..
🙂
J

Trimming the Tree (with ornaments)

 Every Christmas up until last, I’ve bought the kids an ornament at the
after Christmas sales to add to their collection.. then each Christmas
the kids got to decorate the tree with their own ornaments.
They loved this when they were little..

Last year, the kids decided it was too much trouble to put their ornaments
on the tree and that they didn’t really care about collecting ornaments.
It kinda hurt my feelings..

I decided that if I was going to do all the work from now on
that I was going to start over with new ornaments for me.

At the after Christmas sales last year, I bought these ornaments
80 or 90% off.. I was so excited.. my favorite color..
I guess my blue and white tree has gone out of style..
there were so many of them left to buy.. I bought 20 for a little over $20.

A few weeks after that, I was diagnosed with breast cancer and needed
something to do distract myself from my impending surgery
and while recovering. so I started making the quilted ornaments
with the names of Jesus on them that I showed you in July.

Reading the names of Jesus all those weeks was great therapy,
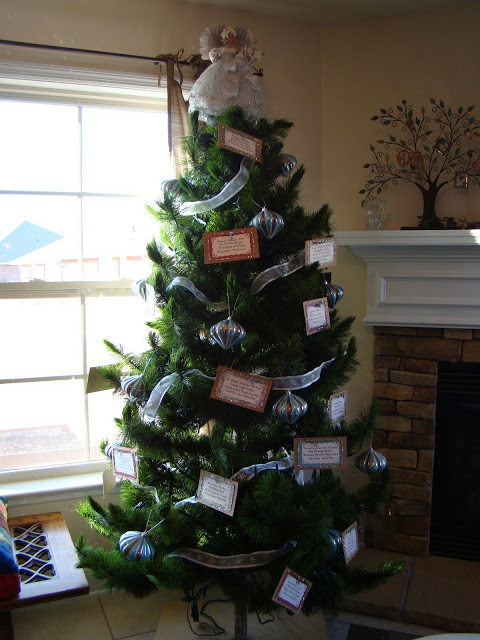
but when I hung them on my new slim tree
a couple of weeks ago.. I didn’t like them. 🙁

I loved reading the names of Jesus on the tree…
and I love quilts.. They just aren’t my decorating style. :-/

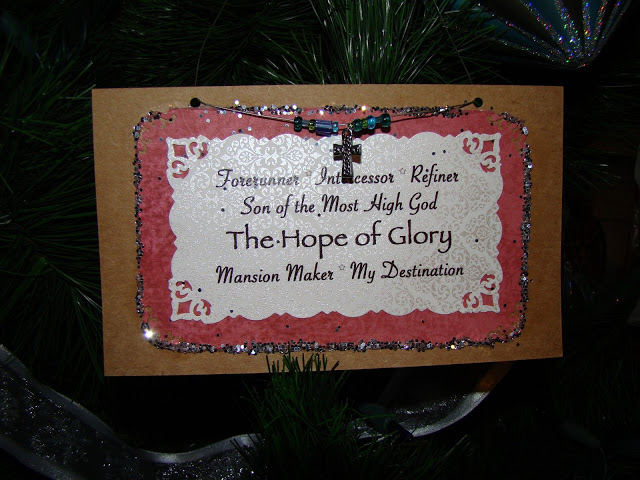
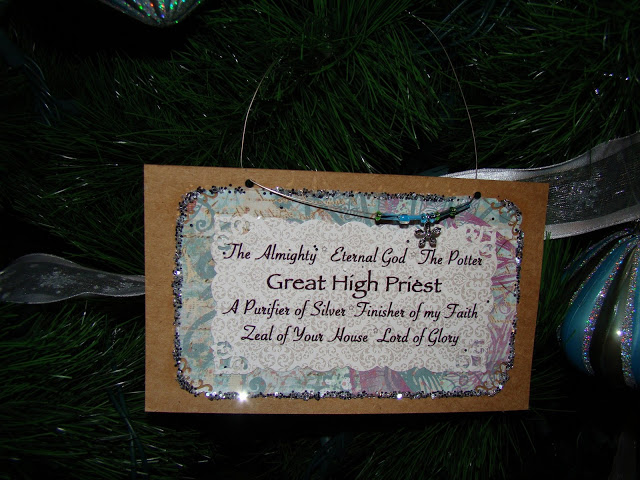
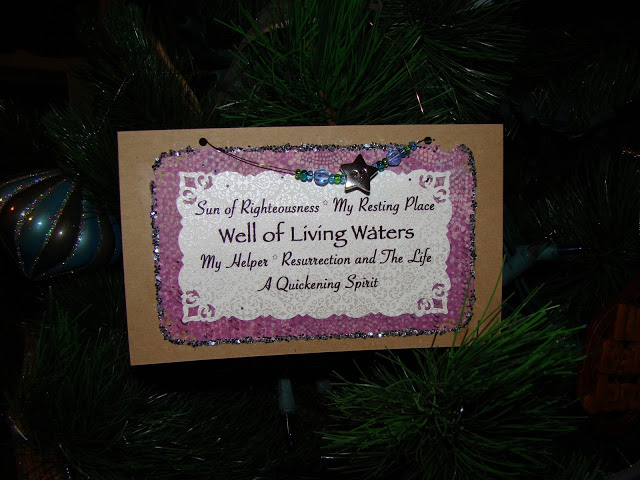
So I decided to make simpler, paper ones.

I bought some scrapbooking paper in my favorite colors
and a corner punch and went to work.
 The cardboard, wire and beads I had on hand.

 Judi and I both liked the glitter idea.

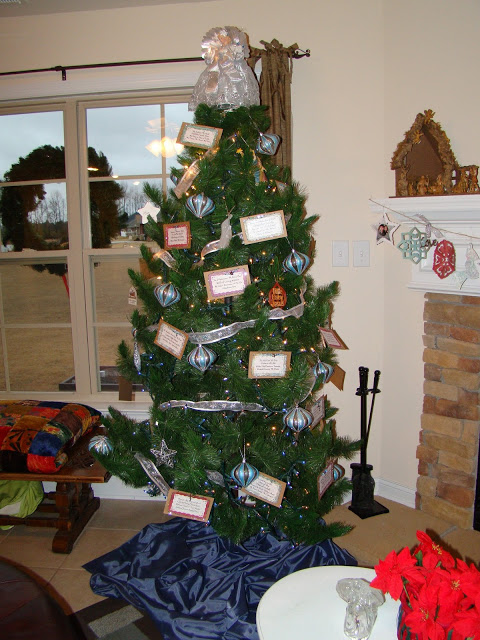
Here’s my new, slim, names of Jesus tree.
I found the ribbon on clearance last year too..

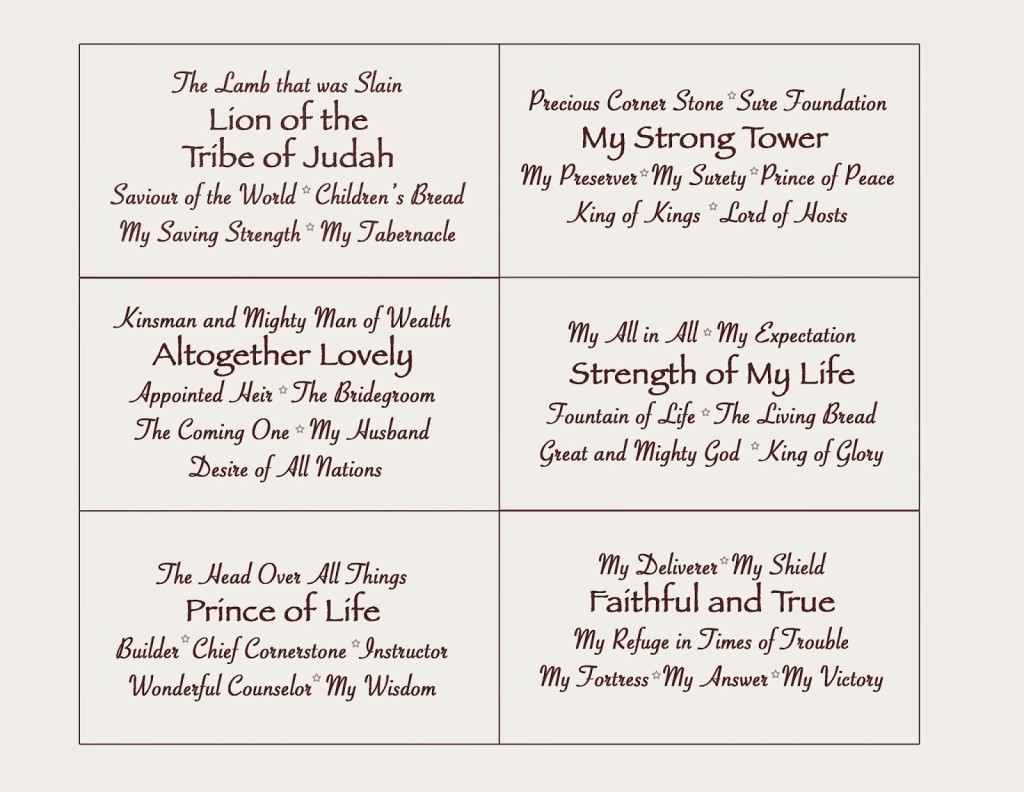
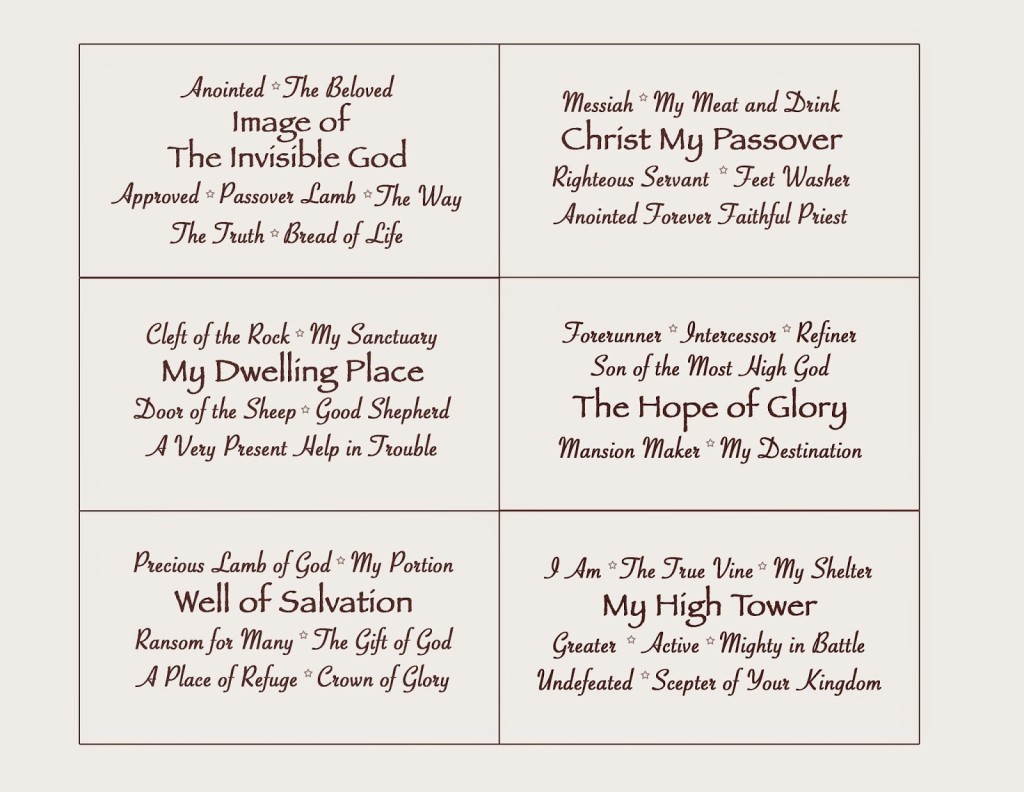
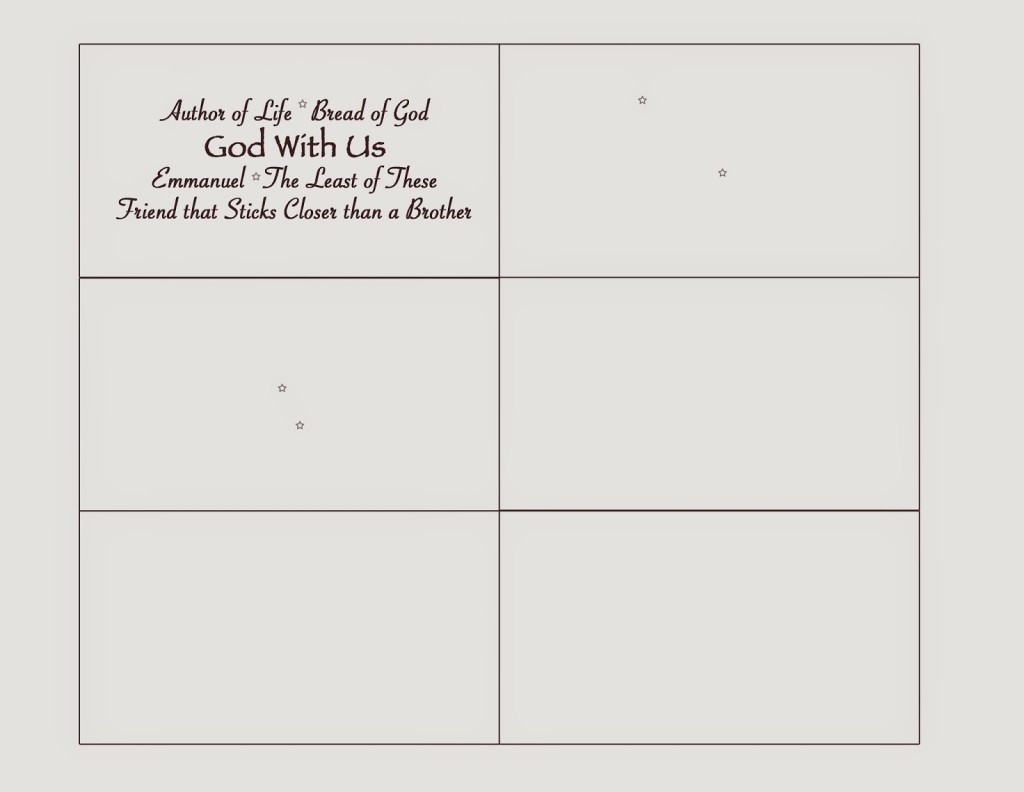
There are 25 different cards with over a hundred names.

I decided that I had room for a few more ornaments
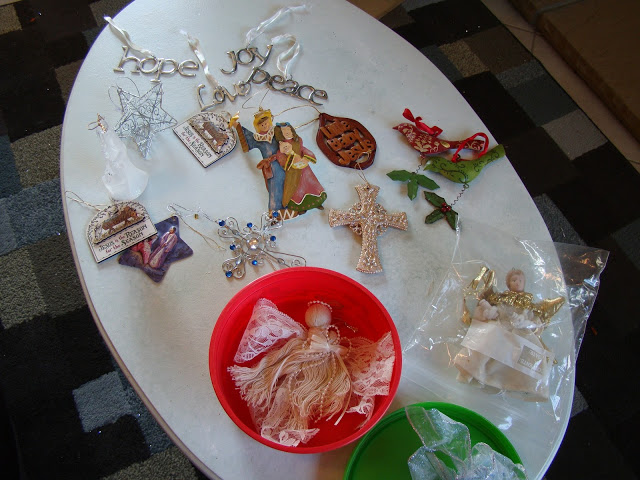
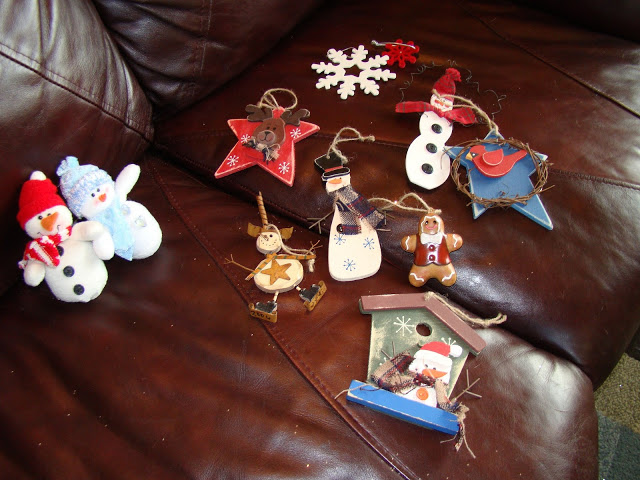
and divided all our old ornaments into themes.

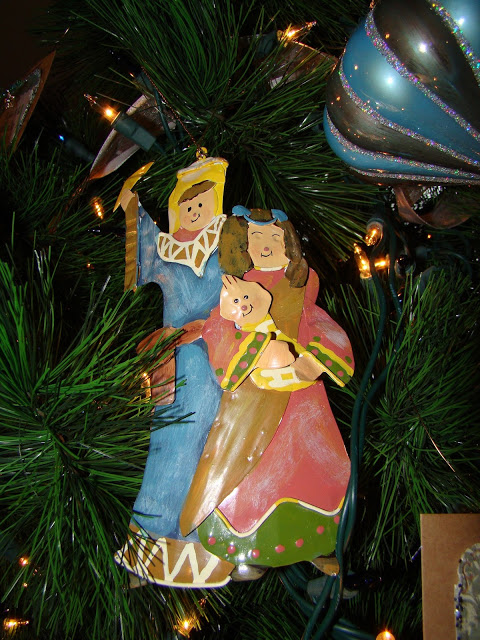
 I hung the ones that reminded me of Jesus on the tree.

This is one of my favorites..

Then decided to save the snowmen for January..
and make a winter wreath or garland.
There were other ornaments that I will try and have the kids
go through and donate to a thrift store next year.
 I didn’t have a tree skirt.. so I pulled this satin out of my
grandmother’s stash and wrapped it around the tree.
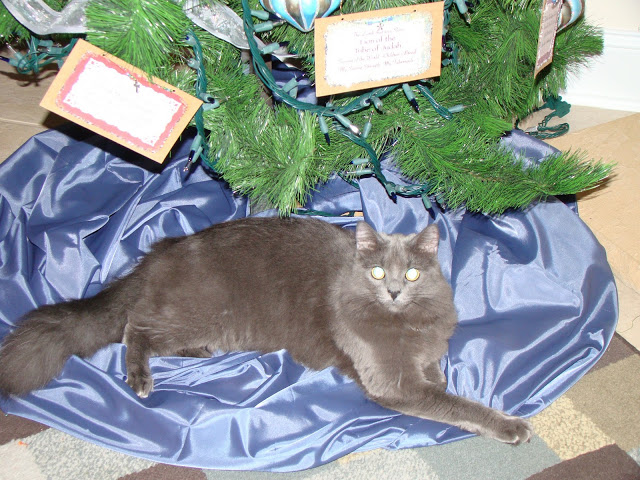
George had to try it out right away.
 My newly decorated tree.
Here are the jpgs if you’d like to print your own:


🙂
J

Trimming the Tree (Literally)

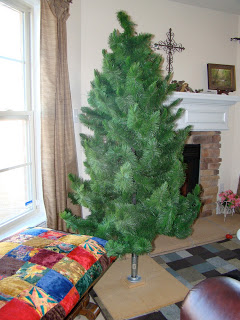
We inherited our Christmas tree from my grandmother quite a while ago.  
I am not sure how old it is, but I’ve seen baby pictures of myself 
sitting in front of it.  It’s a really nice tree..
 it’s been though several up dates since I’ve had it.
One year after the kids played chase around the tree, 
knocked the whole tree over, broke my angel and several ornaments, 
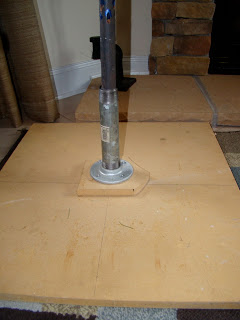
I built this kid/cat proof tree stand out of some scrap particle board 
and some plumbing parts.  Not beautiful.. but it’s so heavy it works great.
 Another year I replaced the center pole after it cracked.
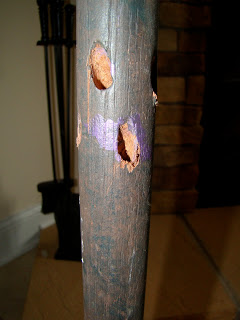
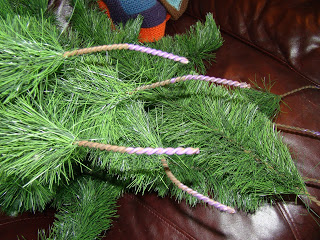
And repainted the color coded ends of the branches
with dollar store fingernail polish.
Since moving to this house I’ve been admiring those new simmer trees.
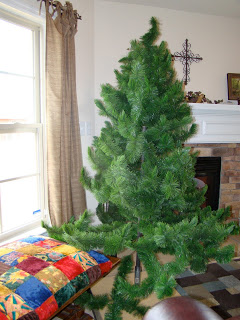
My tree is so wide I normally have to take out a piece of furniture
to make room for it.  And being so wide made it look kinda straggly.
I often used  the string of lights to help support 
a couple of the bottom branches.
Mike and I went out Black Friday and looked at trees.
When I realized that most of them weren’t as nice as mine,
I asked Mike which size skinny
tree did he like the best.. 51″, 45″.. etc.  
My tree was 63″ wide.
then I did some math.. 
This is what it looked like after I used a hack saw 
to trim down the first two rows..
See how wide and straggly the bottom branches look?
And here’s my new slim tree.
I love it!  It looks much fuller and I only had to 
slide over my bench to make enough room for it.
Love,
J

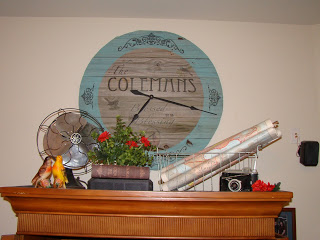
Family Name Clock

I started this project while sitting in my recliner 
for those first two months after my surgery.  
I had a lot of time for staring and thinking.
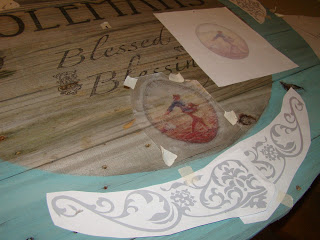
Once I had the idea, I designed it in photoshop.  
Then my good friend, Misty, gave me some boards from her fence
that they were repairing after all that wind damage.
I screwed the boards into a panel and started cutting 
out the circle of the clock months ago.. but my jig saw’s
motor burned up mid circle and my project was put on hold.
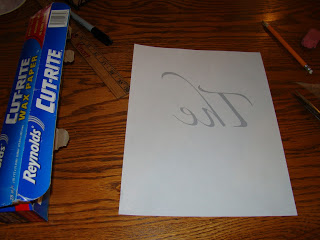
 I printed all my designs out in light gray to save 
ink and laid them on the circle for placement.
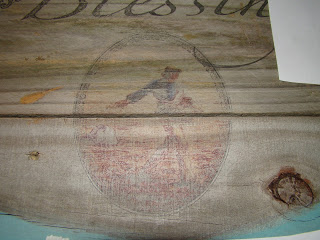
I taped a piece of wax paper to my printer paper and 
ran it through the printer.
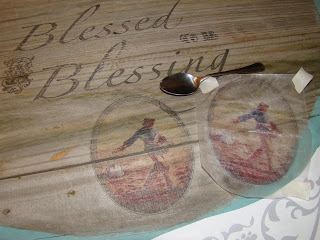
Then I used a spoon to rub the ink and wax on to my wood.
A couple of times it took two coats.
“Blessed to be a Blessing” is our family motto.
 A couple of times I forgot to reverse the image,
a very important step. 
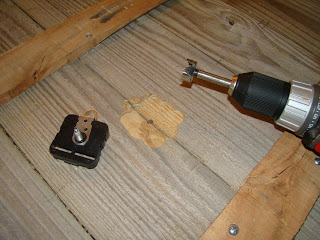
The boards were a little too thick for my clock works. 
So I drilled them down a bit. 
Now I know what time it is.
Love,
Jenny

Wicking House Plants

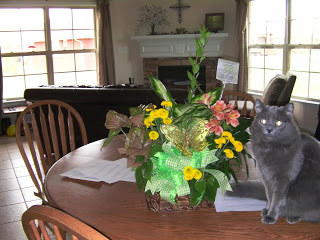
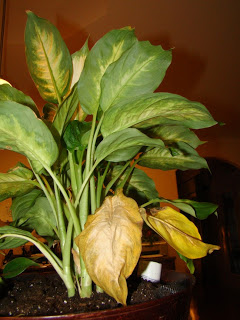
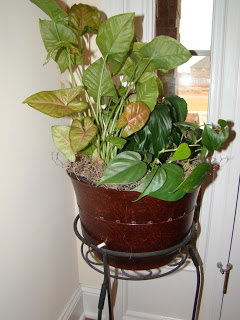
My good friend Suzanne sent me this beautiful arrangement for my birthday.
I wasn’t super excited at first.. 
I think because I was anticipating the guilt of killing them.
In less than 2 months, I’d already killed 5 leaves off this one plant.
But now that I know about wicking planters..
all my plants have to have them.
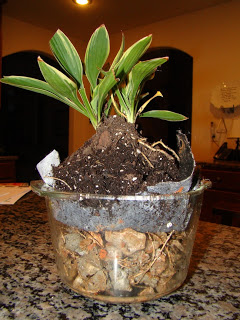
I did a trial run with this on in a glass dish so I could see
if it really worked before digging my big planters out side. 
It worked beautifully.
 
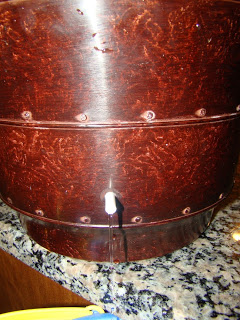
I found these pots at Old Time Pottery for a deal.
Her one arrangement filled two pots.
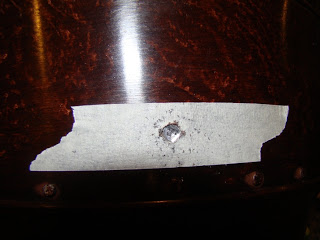
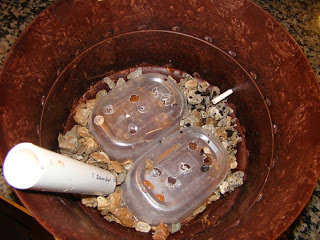
Drilled an overflow hole.
Siliconed in a little tubing.
 Drilled holes in my plastic containers.
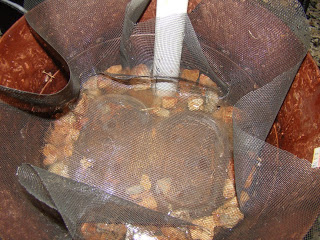
Filled in the rest with rocks.
Put in my fill tube. 
Put in my screen. 
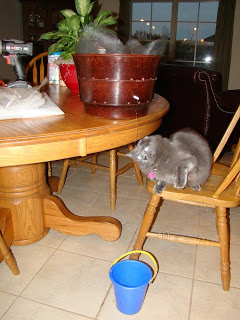
 George thinks the overflow tube is cool.
Put in my dirt and plants.
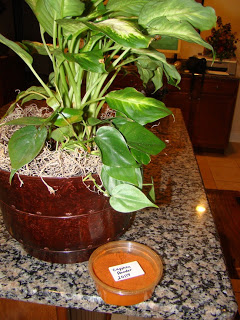
 Sprinkled them with cayenne pepper to keep
George from eating them.
Works like a charm.
 My plants are so happy now.
Perked right up.
Love,
Jenny
« Older posts

© 2025 Finding Joy in Him

Theme by Anders NorenUp ↑